Office Politics
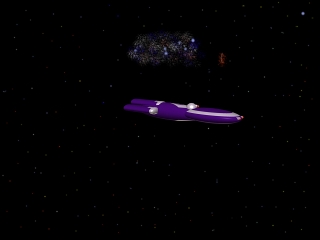
The Highest One is travelling to Osak aboard his flagship, the Adjudicator-class destroyer Krokrik, to address the Board of the Rim Coalition.On board his ship is the newly appointed Adjudicator for his race, a scion of House Arius. Part of the Highest One's schedule includes a tour of the high-tech and agricultural facilities on Wonma in the Osak system, before travelling on from there to the Rim capital, after which, he plans a grand tour of both the Rim and the Frontier.
The Highest One's various rivals, however, have other plans. Using mercenaries and disgraced Humma, they plan to ambush and destroy the Krokrik, killing not only the Highest One, but his hand-picked Adjudicator as well.
They plan to carry out the ambush far enough away from Wonma that any Flight or CFM assets in system will be too late to stop the assassination attempt.
Setup
The ambushers are not be certain of the exact course to Wonma so they have positioned the mercs 15 hexes from the short side of the map and 10 hexes from the long side; the Humma ambushers are 15 hexes from the same short side and 10 hexes from the other long side.
As fate would have it, the Highest One's course is directly between them. Place his ships in the exact center of the short side the ambushers are closest to- all ships must be within 2 hexes of the Highest One's force.
On the opposite side of the map is Wonma and the space station in the center of the short side 12 hexes from the short side with the station orbiting the planet.
Also, Wonma has a moon, positioned in orbit 20-30 hexes from the planet.
Order Of Battle:
Mercenaries: 2 Curiassier-class assault scouts
HS:3 HP:15 DCR:40
ADF:4 MR:4
Crew:5
Weapons: PL(×4)*, RB
Defenses: RH
Engines: 2 Atomic "A"
Special(Optional): One AS has a WNB.
*Pod lasers(assuming 1d5 per PL) are linked for 2d10 damage.
Both assault scouts are at speed 10.
Humma Ambushers: Six Tail Slash heavy fighters:
HS:2 HP:10 ADF:5 MR:4 DCR:20
Highest One: Crew: 2
Weapons: PL(×3), AR
Weapons: PL(×3), AR
Defenses: RH
Engines: 1 Atomic "A"
The Tail Slash fighters are travelling at speed 10 as well
Krokrik
HS:6 HP:40 ADF:4 MR:3 DCR:75

HS:4 HP:15 ADF:4 MR:3 DCR:60
Crew: 50
Weapons:
Weapons:
LC(×2)*, EB, HARM(RB)(×2), TT(×2)
Defenses: RH, MS(x2), ICM(×4)
Engines: 3 Atomic "B"
*Both LCs are forward-firing and fire-linked for 4d10 damage.

2 Springblade-class patrol combatants:
Fochrik Flight Works Springblade-class Patrol Combatant
Crew: 15
Weapons: PL(×4)*, LB, HARM(AR)(×5)
Weapons: PL(×4)*, LB, HARM(AR)(×5)
Defenses: RH, MS(x1)
Engines: 2 Atomic "A"
*PLs are forward firing and linked for 2d10 damage.
All ships are travelling at speed 10.
Special Conditions
Mercanaries wont fight to the death and will flee if the Flight (not CFM) assets can threaten them. They must avoid capture and destruction, as their goal is only to destroy the Krokrik.
Humma ambushers will fight to the death (it's always a good day to die) and since they're already disgraced, they have nothing to lose.
The Highest One, on the other hand, has a lot to lose. If he and/or the Adjudicator die, his House will fall and civil war will erupt on Fokrik.
If he loses face it could be almost as bad.
But losing face will not necessarily cause his house to fall and he has his house and lineage to think of.
He can flee to the safety of the armed space station's guns (at which point, the mercenaries will withdraw), call for the CFM vessel's help, issue a distress call, which means from now on 2 Flight vessels(both Springblades) will turn up on a 1 or 2 of a 1d10 roll, with speeds of 2d10+10(each vessel rolls separately for arrival location 1d10+5 hexes from Wonma's moon), and the CFM freighter will arrive first, if called upon(see below).
Any of those three things mean a minor victory for the ambushers- destruction of the Highest Ones ship while he loses face is a total victory. everything else falls in between.
Reinforcements?(purely optional)
Should the Highest One call for help, or at the end of 1d5 turns(assuming the Krokrik has NOT been destroyed by that time), a CFM Tanstaafl-class bulk freighter arrives on the map 15 hexes west of Wonma's moon.
The bulk freighter's captain will identify herself as Maria Craig, Shipmaster of the Free Merchant Ship Rules of Acquisition, and will profess her willingness to assist the Highest One.
The ship has the following stats:
Crew: 23
Weapons: LC(×2)*, EB, PB
Weapons: LC(×2)*, EB, PB
Defenses: RH, MS(x2)
Engines: 4 Atomic "B"
Notes: Carries six White Blaze interceptors in its cargo bay. Laser cannon are linked for 4d10 damage. Equipped with a white noise broadcaster.
and enters the map at a speed of 15.
At the beginning of the Highest One's next turn, the Rules Of Acquisition will launch her White Blaze interceptors...all crewed by disgraced Humma formerly of the Eruditi lineage. The Rules will then activate her WNB, before closing(at max burn, increasing her speed to 18) to effective range of her beam weapons and open fire on the Krokrik(the ambushing Tail Slash heavy fighters are part of the ship's fighter complement), seeking to blow the ship away, before the Flight arrives to complicate matters.
While the disgraced Humma will gladly throw away their lives to complete the mission, Craig and the crew of the Rules Of Acquisition will NOT. She plans on a single high-speed pass, using the ship's weapons to fry the Krokrik and anyone else who interferes(including any Flight assets), before she turns her guns on her Humma accomplices(mercenary assault scouts will retreat and never be heard from again)and leaves the scene of the crime.
Should the Krokrik make it to the safety of the armed station, the Rules Of Acquisition will break off its attack.
(If you feel this option is two and a half strikes against the Highest Ones, then don't use it.)
Things To Consider
The Highest One's player should try his best to avoid losing face, but, if faced with the alternative of running and hiding inside the armed station or being blown out of the sky, the Highest One should consider the good of his lineage and his house and choose the better part of valor("he who fights and hops away will live to hop another day.").
The ambushers, on the other hand, should try to remove the Krokrik as quickly as possible, then run like hell, before the Flight shows up. Humma will sacrifice themselves for the mission, as they have nothing to lose anyway, but the mercs aren't being paid to be kamikazes; if the battle goes against them, it's time for them to go.